For over two decades, I’ve dedicated my career to helping individuals sculpt their ideal physique, whether through weight gain, weight loss, or advanced bodybuilding techniques. A cornerstone of nearly every successful strength and hypertrophy program is the bench press. Far more than just pushing weight, mastering this movement is an art form rooted in precise technique and a deep understanding of biomechanics. In this comprehensive guide, we’ll dissect the bench press, exploring its target muscles, optimal setup, flawless execution, and the common pitfalls to avoid.
Unveiling the Musculature: Who’s Doing the Work?
The bench press is a compound movement that recruits several key muscle groups in a synergistic fashion. Understanding their roles is crucial for maximizing your results:
- Pectoralis Major (Pecs): These are the primary movers, with both the sternal head (mid and lower chest) and clavicular head (upper chest) heavily engaged. Their main function here is horizontal shoulder adduction, bringing your upper arm across your body.
- Triceps Brachii: These three-headed muscles on the back of your upper arm are essential for elbow extension, driving the bar upwards.
- Anterior Deltoids (Front Delts): Located at the front of your shoulders, they assist the pecs in horizontal shoulder adduction and contribute to shoulder flexion, particularly at the top of the movement.
- Latissimus Dorsi (Lats): While not a prime mover, the lats play a surprising, albeit subtle, role, particularly at the very bottom of the press. They become active when the shoulder is extended behind the torso, contributing to stability and helping to initiate the drive off the chest.

Beyond Brute Strength: Why Individual Differences Matter
Before we dive into setup, it’s vital to frame your perspective on bench press strength. Avoid comparing your numbers to anyone else’s. Your bench press performance is influenced by a multitude of individual factors:
- Limb Length: Longer arms mean a greater range of motion, which can make the lift feel heavier.
- Ribcage Size: A larger, more developed ribcage can create a better platform and reduce the bar’s travel distance.
- Muscle Origins and Insertions: Subtle anatomical variations can significantly impact leverage.
- Lumbar Spine Mobility: Your ability to establish and maintain an arch in your lower back directly affects leverage and stability.
- Upper Back Strength and Stability: A strong upper back provides a solid foundation from which to press, preventing energy leaks.
Your personal best is your only true benchmark for progress.
The Foundation: Precision Setup for Power and Protection
The setup for the bench press is arguably the most critical component, directly impacting load potential, injury risk, and overall muscle activation. While the following describes a strength-focused, powerlifting-style setup, its principles are highly beneficial for anyone aiming to build substantial chest size due to its emphasis on maximizing load and minimizing strain. Slight modifications for pure bodybuilding will be noted.
- Preparation and Safety First:
- Weight Check: Always double-check that the barbell is loaded evenly on both sides.
- Bar Centering: Ensure the bar is perfectly centered in the rack.
- Spotter: If you’re pushing close to your limits, always have a competent spotter. If unracking solo, you might elevate your hips for the lift-off and then lower them once stable, though I personally advocate for a spotter for maximal efforts.
- Lying on the Bench:
- Head Position: Lie flat with your head positioned underneath the bar.
- Scapular Retraction & Depression: This is key. Place your feet on the bench, then actively squeeze your shoulder blades together and pull them down towards your glutes. Imagine trying to “screw” your upper back into the bench. Maintain this retracted and depressed position throughout the entire lift. This creates a stable platform, protects your shoulders, and contributes to a powerful arch.
- Establishing the Arch: While keeping your shoulder blades locked, lift your hips high. You can either grab the bar with your chosen grip to help pull yourself into position, or push against the uprights of the bench. Some find it easier to achieve a maximal arch by going onto their toes during this setup phase.
- Back Planted: Once you’ve achieved your desired arch, plant your upper back firmly into the bench. Your eyes should be directly under the barbell.
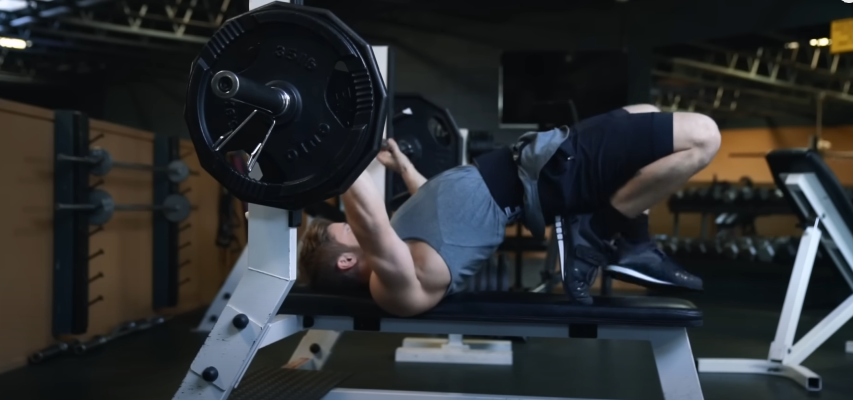
- Leg Drive Setup:
- Foot Placement: Lower one foot at a time, positioning your feet as far back as is comfortably possible, keeping them close to the bench when viewed from the front. For competitive powerlifting, your heels must be flat on the ground. This may necessitate externally rotating your feet or pointing your toes outwards.
- Hip Drop: Ensure your glutes are firmly in contact with the bench.
- Grip and Wrist Alignment:
- Grip Width: Your ideal grip width is highly individual. I personally use a wider grip as it’s where I feel strongest. Research indicates that wider grips tend to emphasize the sternal pecs and anterior deltoids, while closer grips target the triceps and upper chest more. Experiment to find what feels best and produces the strongest contraction for you.
- Joint Stacking: From a rear view, your wrists should be roughly stacked directly over your elbows. While advanced lifters sometimes deviate, a 2007 study suggests a maximum grip width of 1.5 times the acromial distance (roughly 1.5 times shoulder width) is optimal for minimizing injury risk without significantly compromising strength.
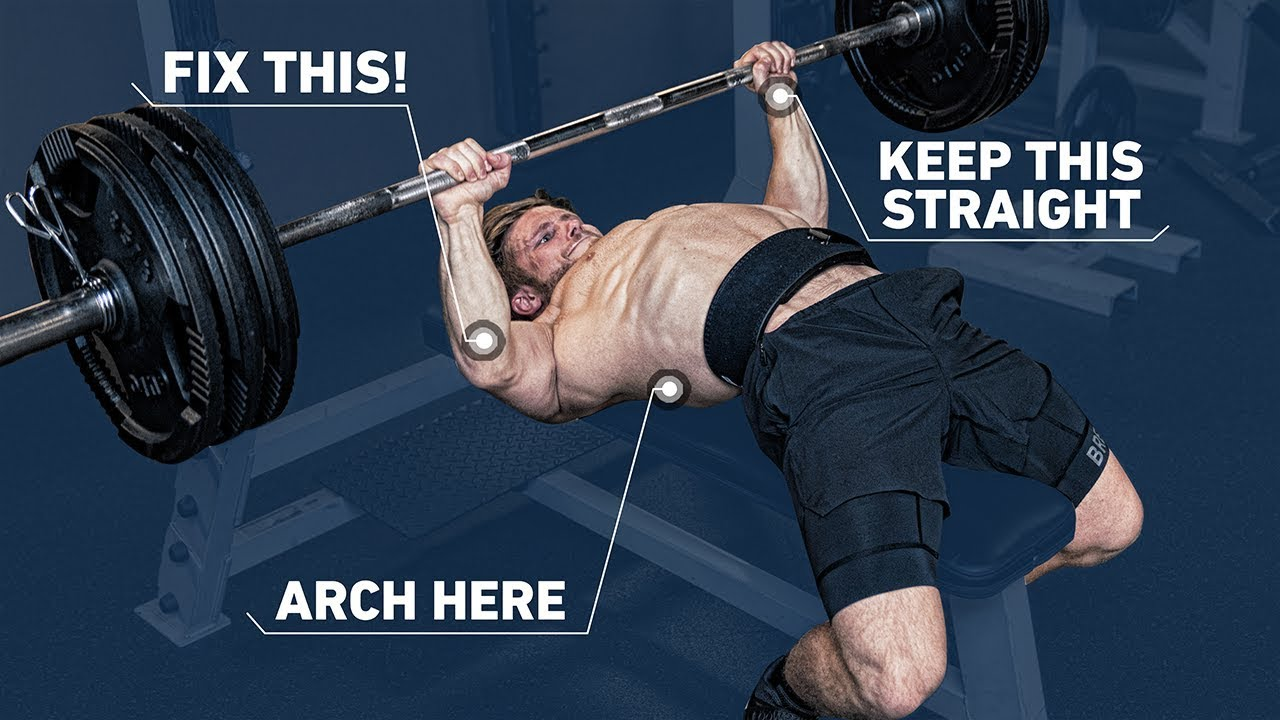
- Wrist Position: From a side view, ensure your wrists are stacked directly below your knuckles, avoiding excessive hyperextension. A useful cue is to imagine “punching the ceiling” just before unracking.
- Final Check and Bodybuilding Modifications:
- Perform one last check to ensure your shoulder blades are aggressively retracted and depressed.
- For Pure Bodybuilding: You won’t need as extreme an arch as a competitive powerlifter. Your feet can be positioned slightly further forward. However, always maintain shoulder blade retraction and a natural arch in your lumbar spine for shoulder health and stability. It’s worth noting that the perceived difference in bar travel between a maximal arch and a “flat back” bench is often exaggerated; the joint ranges of motion can be remarkably similar. Focus on building some arch for safety and strength rather than fearing a “limited” range of motion.
Executing the Lift: The Four Phases of a Perfect Press
With your meticulous setup complete, it’s time to execute the lift. We’ll break this down into four distinct phases: Unrack, Brace, Descend, and Press.
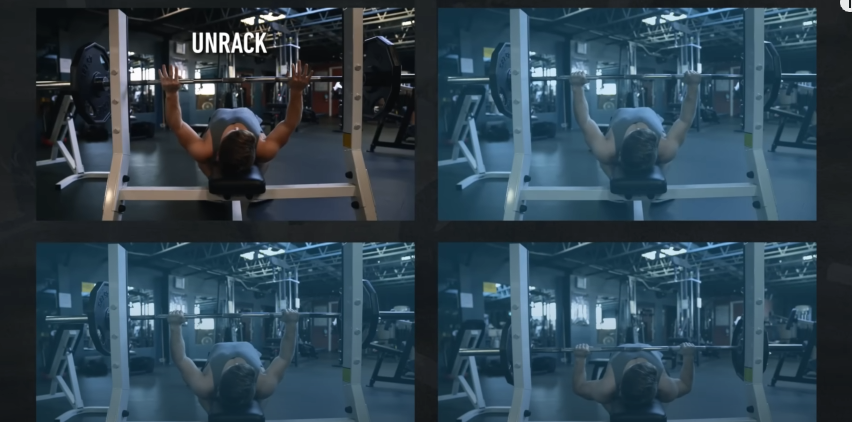
- Unrack:
- If using a spotter, instruct them to assist you in lifting the bar out, not up.
- Ensure all four points of contact are maintained: head, upper back, glutes, and feet firmly planted.
- Brace:
- Take a deep breath into your diaphragm (your “gut”), pressing the air outwards against your belt if you’re wearing one.
- Consciously puff your chest out to expand your ribcage maximally.
- Grip the bar as hard as possible. Some find the cue to “bend the bar” or “rip the bar in half” effective for activating upper back muscles and maintaining total body tightness.
- Descend:
- Lower the bar by allowing your elbows to drop at a 45-degree angle relative to your torso when viewed from above. This angle is widely accepted among top coaches.
- From a side view, your elbows should remain stacked under the bar as it descends.
- The bar path should be down and slightly forward simultaneously.
- Touch your chest just below nipple level, towards the bottom of your sternum – this should be the highest point of contact on your chest.
- You can optionally pause for one second on your chest (required in powerlifting) or simply perform a controlled “tap” for bodybuilding, ensuring you’re not bouncing the weight.
- Press:
- Explode the bar off your chest by driving your heels into the floor. Think about “pushing the floor away” with your feet to initiate leg drive.
- Crucially, press the bar back toward your face and off your chest, rather than simply straight up. This creates a natural arc that optimizes leverage.
- As you approach your sticking point (the most challenging part of the lift, usually 20-40% off the chest), maintain your powerful drive. For raw strength, try to “blast through” this point with maximal speed.
- As you pass the sticking point, you can optionally exhale, or hold your breath until lockout.
- Complete the arc back to the starting position, with the bar directly over your nipples. Repeat for the prescribed repetitions.
Common Errors and Their Corrections
Even with detailed instructions, certain errors frequently manifest in the bench press. Here are the top three and how to fix them:
- Incorrect Elbow Tuck:
- Over-tucking: This cue originated from equipped powerlifting (using a bench shirt) and is often unhelpful for raw lifters.
- Over-flaring: Keeping your elbows parallel to the bar throughout the entire lift increases shoulder injury risk and creates an inefficient, weaker bar path.
- Correction: Aim for a 45-degree elbow tuck during the descent. However, as you encounter the sticking point on the ascent, a slight flair can help recruit more pecs and allow your elbows to better stack under the bar to finish the lift. If you struggle to feel this, practice slow eccentric presses with lighter weights, consciously focusing on your elbow position throughout the negative.
- Benching with a Flat Back:
- While you might not need an extreme arch, maintaining some lumbar arch offers significant benefits:
- Spinal Safety: The lumbar and thoracic spine are safer and more stable in a lordotic (arched) position under load.
- Shoulder Health: A slight arch creates a more favorable, “declined” pushing angle for the shoulder joint, reducing impingement risk.
- Increased Strength: You will simply be stronger in this position, allowing for greater overall load on your target muscles.
- Correction: Dedicate time to practice your arching technique during setup, even with light weights or just your bodyweight.
- While you might not need an extreme arch, maintaining some lumbar arch offers significant benefits:
- Lack of Leg Drive:
- If your feet are merely placed passively or too far forward, you’re missing out on a tremendous source of power.
- Correction: Actively use your legs! Drive your heels into the floor, imagining you’re pushing the entire bench away from you. Mastering leg drive takes practice, but it’s crucial for maximizing your pressing potential.
The bench press is a cornerstone of any serious training program, and by mastering its nuances, you’ll unlock unprecedented gains in both strength and muscle mass. Prioritize precision, stay consistent, and prepare to forge a truly impressive physique.